
How To Install A Thermometer On Your Grill: A Comprehensive Guide For Perfectly Grilled Food
Learning how to install a thermometer on your grill is an important skill that enhances your grilling adventures.
To achieve the perfect level of doneness, you need precise control over the temperature, and a thermometer is a crucial tool for that.
In this comprehensive guide, we will provide step-by-step instructions on how to install a thermometer on your grill.
Whether you're a beginner or an experienced griller, adding a thermometer will take your grilling skills to the next level.
With the ability to accurately monitor and control the temperature, you'll have the confidence to create delicious grilled dishes every time you cook.
Get ready to embark on a journey of mastering temperature control as we explore the art of installing a thermometer on your grill.
Prepare to transform your grilling experience and become a skilled grilling enthusiast!
Why You Should Install A Thermometer On Your Grill
Grilling is more than just cooking food over a flame. It's an art that involves balancing flavors, textures, and most importantly, precise temperature control.
That's why adding a thermometer to your grill is so important. Temperature control is the key to successful grilling. Different types of food require specific internal temperatures to achieve their desired doneness.
Whether you're grilling steaks, chicken, seafood, or vegetables, knowing the exact temperature inside your grill is crucial to ensure each item is cooked perfectly.
You Can Gain Valuable Insights When You Install A Thermometer On Your Grill
Adding a thermometer to your grill offers valuable insights during the cooking process. It allows you to monitor the internal temperature of your grill accurately, enabling you to make necessary adjustments for optimal grilling.
Using a thermometer brings precision and accuracy to your cooking. You no longer have to rely on guesswork to determine if your food is cooked properly.
With a thermometer, you can consistently achieve the desired level of doneness.
You can ensure that each steak is perfectly cooked to your liking, chicken is safe to eat with no raw parts, and fish is tender and flaky.
The thermometer removes uncertainty from grilling and helps you create delicious meals every time.
You Gain Peace Of Mind When You Install A Thermometer On Your Grill
When you install a thermometer on your grill, it provides you with peace of mind. It ensures that your food is cooked at the right temperatures, which kills harmful bacteria and reduces the risk of foodborne illnesses.
This means you can confidently serve delicious meals to your loved ones, knowing that the food is cooked safely.
Having a thermometer on your grill also opens up exciting possibilities for your cooking. With precise temperature control, you can experiment with different grilling techniques, such as indirect grilling or searing at high heat.
This allows you to explore a whole new world of flavors and textures, from tender slow-smoked ribs to perfectly charred vegetables. It's an opportunity to enhance your grilling skills and create amazing dishes.
Installing A Thermometer Is A Game-changer
In conclusion, adding a thermometer to your grill is a game-changer. It ensures consistent cooking results, promotes food safety, and allows you to embark on exciting culinary journeys.
In the upcoming sections, we will guide you through the process of installing a thermometer on your grill. This will empower you with the knowledge and tools to take charge of your grilling adventures and amaze everyone with your mouthwatering dishes.
Prepare yourself to elevate your grilling skills using the magic of temperature control!
Do I Need To Replace My Grill Thermometer?
Grill thermometers play a big role in cooking delicious meals, but just like any tool, they can wear out over time.
Understanding when to replace your grill thermometer is important to ensure you get accurate temperature readings and achieve the best grilling results.
Consider the following factors when deciding if it's time to replace your grill thermometer:
Inaccurate Readings:
If your grill thermometer is consistently showing wrong temperature readings, it might be time to get a new one.
To check its accuracy, compare it with a trustworthy digital thermometer or temperature probe.
If you notice a big difference in the readings, it means your grill thermometer is no longer reliable and needs to be replaced.
Damage Or Wear:
Examine your grill thermometer carefully to see if there are any obvious signs of damage or wear.
Check for cracks, breaks, or foggy display screens. Also, inspect the connections to see if they are loose or corroded.
If you spot any of these signs, it's likely a good idea to replace your thermometer. These problems can affect how well it works and how accurate its readings are.

Rust Or Corrosion:
When your grill thermometer gets wet or faces tough weather conditions, it can start to rust or corrode.
Inspect the stem, probe, and other metal parts for any signs of rust or corrosion. Rust can affect how accurate the thermometer is and even make it weaker.
If you see a lot of rust or corrosion, it's a good idea to get a new thermometer. This way, you can make sure you always get readings you can trust and keep your grilling safe.
Malfunctioning Features:
Consider the extra features on your grill thermometer, such as timers, alarms, or wireless connectivity.
If these features are not working correctly or consistently, it might mean that your thermometer is starting to wear out.
Think about how important these features are to your grilling needs and decide if their malfunctioning is a good reason to get a new thermometer.
Age And Lifespan:
Keep in mind that grill thermometers don't last forever, especially when they're exposed to high heat and outdoor conditions.
Consider how long you've been using your thermometer and how long it's supposed to last.
If your thermometer has been used for many years and has seen regular use, it's a smart decision to replace it. This ensures that you can rely on accurate temperature readings every time you grill.
An Accurate Thermometer Is Very Important
Remember, having a thermometer that works properly and provides accurate readings is extremely important.
If you're unsure about the reliability or accuracy of your grill thermometer, it's better to be safe than sorry and consider getting a new one.
Investing in a new thermometer will give you peace of mind, knowing that your temperature readings are reliable.
This way, you can confidently grill your food to perfection and enjoy delicious meals every time.

Gain the skills and confidence You need to Level up your BBQ game with my FREE Cookbook
Can You Install A Thermometer On Your Grill?
Definitely! Installing a thermometer on your grill is a great idea. It helps you control the cooking temperature and ensures your food turns out just the way you want it.
Different Types Of Thermometers
There are different types of thermometers available for different grill models.
You can choose a lid-mounted thermometer that attaches to the grill lid and measures the inside temperature accurately.
Or you can go for a probe thermometer that has a probe you can put into the food to check its temperature.
Built-In Thermometer Ports
Some grills even have special ports made for adding thermometers easily.
Adding a thermometer makes your grilling experience better and helps you cook your food consistently without it being too raw or overcooked.
With a thermometer, you can make delicious meals every time you use your grill with confidence.
Tools And Materials Needed To Install A Thermometer On Your Grill
Before you begin installing a thermometer on your grill, it's important to gather the necessary tools and materials.
Here's a list of items you'll need to complete the installation:
Thermometer Kit: When you're shopping for a thermometer kit, make sure it has a probe and a digital display unit. It should be made specifically for grilling and be able to measure the temperature range you need for your cooking.
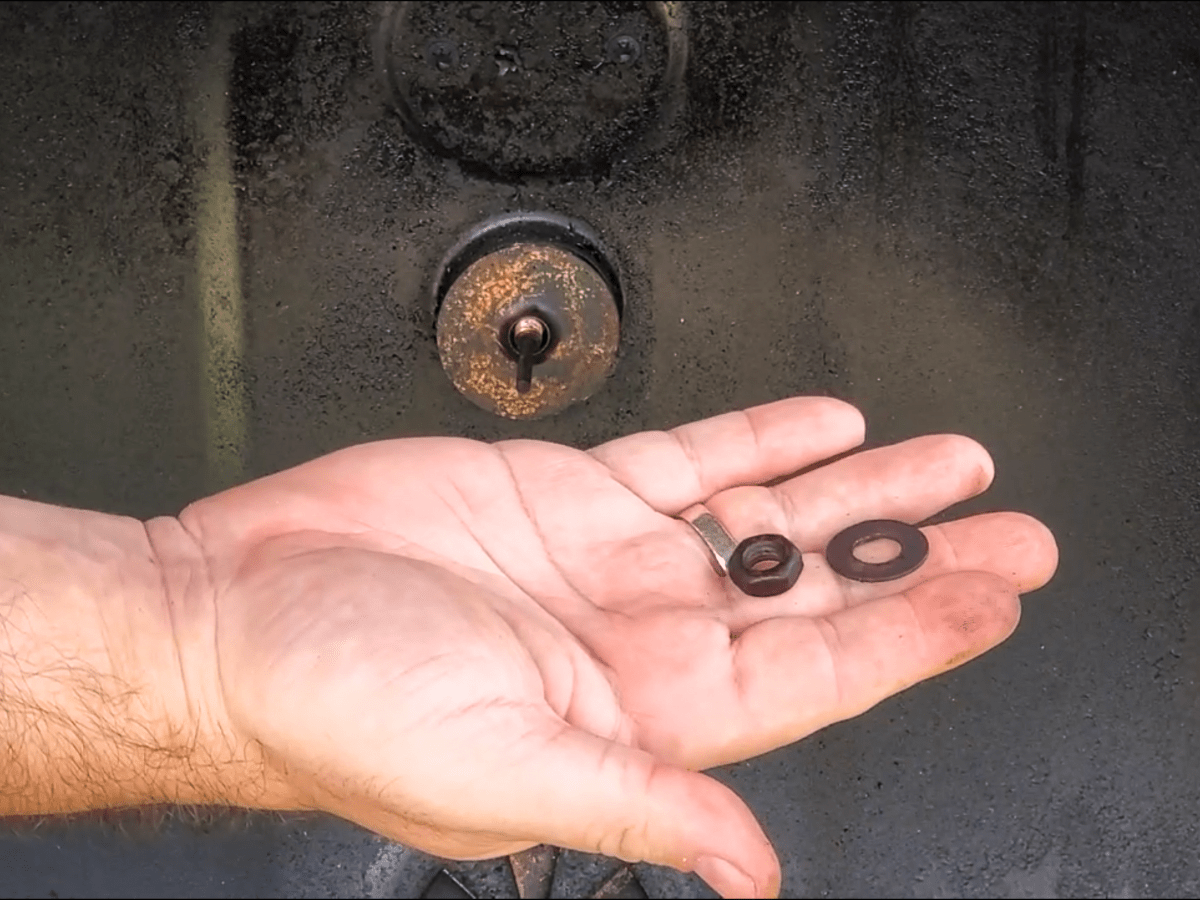
Thermometer Mounting Hardware: The type of mounting hardware you need for your grill thermometer will depend on the kind of grill you have and the thermometer kit you chose. It might include screws, nuts, washers, or brackets. Check the instructions that come with your thermometer kit to know exactly which mounting hardware you'll need.
Screwdriver: To secure the mounting hardware and attach the thermometer to your grill, you'll need a screwdriver. Choose a screwdriver that matches the screws in your kit to make sure they fit correctly.
Drill (if necessary): Sometimes, you might have to use a drill to make holes for attaching the probe or display unit of your grill thermometer. If the instructions say you need to drill, make sure you have a drill and the correct drill bit to do the job.

Pliers (if needed): Having a pair of pliers can come in handy while installing the thermometer. Pliers can be used to tighten screws or make adjustments to some parts if needed. It's a good idea to have them nearby in case you require them during the installation.
Cleaning Tools: Before installing the thermometer, it's crucial to clean your grill thoroughly. This will create a clean and smooth surface for attaching the thermometer and ensure accurate temperature readings. Have some grill cleaning brushes, degreaser, and a cloth or paper towels on hand for cleaning purposes.
Optional: Drill Template (if included): Some thermometer kits may include a drill template. This tool is helpful because it shows you where to drill the holes precisely. If your kit has a drill template, keep it nearby for easy guidance during the drilling process.
By collecting these tools and materials ahead of time, you'll be ready to install the thermometer on your grill easily and without any problems.
In the following section, we'll provide you with step-by-step instructions on how to install a probe thermometer on your grill.
Step-By-Step Guide Of How To Install A Thermometer On Your Charcoal Grill
Now that you have all the necessary tools and materials, it's time to proceed with the installation of the thermometer on your grill. Follow these step-by-step instructions to ensure a successful and accurate installation:
1. Choose The Ideal Location
Identify the best location on your grill to mount the thermometer. Consider a spot that provides easy visibility and accessibility while grilling. It should be away from direct heat sources and positioned where it can accurately measure the temperature of the cooking area.
2. Prepare The Grill
Before attaching the thermometer, clean your grill thoroughly to remove any grease, debris, or residue. Use grill brushes and a degreaser to ensure a clean surface where the thermometer will be mounted. Wipe the area dry with a cloth or paper towels.
3. Read The Installation Instructions
Carefully read the installation instructions provided with your thermometer kit. Different thermometer models may have specific requirements and variations in the installation process. Familiarize yourself with the instructions to ensure you understand the steps involved.
4. Mounting The Probe
If your thermometer kit includes a probe, determine the appropriate location for it. Some kits may require drilling a hole to mount the probe, while others may have a pre-existing hole or an adjustable clamp.
Follow the instructions provided with your kit to securely attach the probe to your grill.
5. Attaching The Digital Display Unit
If your thermometer kit includes a separate digital display unit, decide where to position it. It can be attached to the grill lid or another convenient location. Use the mounting hardware provided or follow the instructions for attaching the display unit securely.
6. Connect The Probe And Display Unit
If your thermometer has a detachable probe, connect it to the digital display unit according to the instructions. Ensure a secure connection between the probe and the display unit, as this allows for accurate temperature readings during grilling.
7. Test The Thermometer
Before starting your grilling session, perform a quick test to ensure the thermometer is functioning correctly. Follow the instructions provided to verify that the thermometer displays accurate temperature readings. This step is crucial for reliable temperature monitoring while cooking.
8. Secure Loose Components
Double-check all the mounting hardware, screws, and connections to ensure they are tight and secure. This prevents any movement or instability of the thermometer while grilling, ensuring accurate temperature readings throughout the cooking process.
9. Start Grilling With Confidence
With the thermometer successfully installed, you're now ready to start grilling with confidence. Monitor the temperature displayed on the thermometer as you cook, allowing you to achieve precise results and perfectly grilled food..
Consult Your Thermometer's User Manual For Specific Instructions
Remember to refer to the user manual that came with your thermometer for detailed instructions on how to use it.
The manual will provide valuable information on temperature ranges, cleaning methods, and how to calibrate the thermometer for accurate readings.
By regularly cleaning and calibrating your thermometer as instructed, you can ensure its accuracy and extend its lifespan.
With your newly installed thermometer, you're now equipped to take your grilling skills to the next level and enjoy consistent and delicious results every time you fire up the grill.
How To Install A Thermometer On A Gas Grill
Installing a thermometer on your gas grill is a straightforward process that can greatly enhance your grilling experience.
Not only will it help you monitor and maintain the temperature inside the grill, but it will also ensure perfectly cooked and flavorful meals.
Follow these step-by-step instructions to install a thermometer on your gas grill:
Choose The Right Thermometer:
When it comes to gas grills, it's essential to select a thermometer that's specifically made for grill lid installation. Look for one that fits your grill's design and purpose.
Pay attention to the thermometer's temperature range, accuracy, and durability. These factors will determine how well it performs and how reliable it is in giving you accurate temperature readings.
Find The Perfect Spot:
When installing the thermometer on your grill lid, it's important to choose the right location. Look for a spot that is easy to see and reach, but make sure it doesn't get in the way when you open or close the lid. This way, you'll have clear visibility and convenient access to monitor the temperature while grilling.
Get The Lid Ready:
Before installing the thermometer, it's important to prepare the area on the grill lid. Start by cleaning the surface where you want to place the thermometer. Use a mild cleaner and a soft cloth to remove any dirt, grease, or residue.
Once you've cleaned it, make sure the surface is dry and free from any debris. This will provide a clean and smooth area for the thermometer to be installed properly.
Create The Mounting Hole:
To install the thermometer, you'll need to drill a hole in the grill lid. Start by measuring the diameter of the thermometer's stem or probe. Then, choose a drill bit that matches the size of the stem.
Carefully drill the hole in the predetermined location on the grill lid. Be cautious and take your time to ensure a proper and secure fit for the thermometer.
Install The Thermometer:
Now it's time to insert the thermometer into the grill lid. Take the stem or probe of the thermometer and push it through the mounting hole from the outside of the lid.
Make sure the faceplate or display of the thermometer is facing outward so you can read it easily.
To keep the thermometer in place, use the nuts, washers, or mounting hardware that came with it. Attach them on the inside of the lid and tighten them until the thermometer is firmly secured.
Test The Thermometer:
After installing the thermometer, it's important to make sure it works properly. Heat up the grill to your desired temperature and compare the reading on the thermometer with a reliable digital thermometer or temperature probe.
If there's a significant difference, you may need to adjust the thermometer to ensure accurate temperature readings.
Maintain And Clean The Thermometer:
It's important to keep your thermometer clean for accurate readings. Regularly wipe the thermometer's faceplate and stem with a soft cloth or sponge and mild soapy water to remove any dirt or grease buildup.
Avoid using harsh cleaners or chemicals that can harm the thermometer's parts.
Achieve Consistent Results And Enjoy Deliciously Grilled Meals Every Time
By following these steps, you can easily install a thermometer on your gas grill and take full control of your grilling process. With accurate temperature monitoring, you'll be able to achieve consistent results and enjoy deliciously grilled meals every time.

Install A Thermometer On Your Grill: Calibration And Testing
Once you have installed a thermometer on your grill, it is important to calibrate and test it to ensure accurate temperature readings.
Calibration is the process of adjusting the thermometer to match known standards, while testing verifies its accuracy.
Follow these steps to calibrate and test your grill thermometer:
1. Prepare An Ice Bath
Start by preparing an ice bath. Fill a large bowl with crushed ice and add a small amount of water to cover the ice. Stir the mixture to ensure a consistent temperature throughout the bath
2. Check The Ice Bath Temperature
Using a calibrated thermometer (such as a digital instant-read thermometer or a certified food thermometer), measure the temperature of the ice bath. It should read 32°F (0°C) since this is the freezing point of water.
3. Compare Reading
Insert the probe of your grill thermometer into the ice bath, making sure it is fully submerged. Wait for the temperature reading to stabilize, which may take a few minutes.Compare the reading on your grill thermometer with the known temperature of the ice bath. If there is a difference, note the variance for calibration purposes
4. Adjusting The Calibration (If Necessary)
If your grill thermometer is adjustable, use the manufacturer's instructions to adjust the calibration. Most adjustable thermometers have a small nut or screw that can be turned to increase or decrease the reading. Refer to the thermometer's user manual for specific calibration instructions.
5. Repeat The Testing
After calibrating the thermometer, repeat the testing process by inserting the probe into the ice bath again. The thermometer should now read 32°F (0°C) or very close to it.If the thermometer is still not reading accurately, consider contacting the manufacturer for further assistance or consider replacing the thermometer with a new one.
6. Test High Temperature Accuracy
In addition to checking the accuracy of your grill thermometer at freezing temperatures, it's important to verify its reliability at higher temperatures as well. You can do this by performing a boiling water test. Here's how:
Fill a pot with water and heat it until it reaches a rolling boil.
Insert the thermometer probe into the boiling water, ensuring that it doesn't touch the sides or bottom of the pot.
The thermometer should display a temperature of 212°F (100°C) at sea level, indicating that it is accurate.
If the reading deviates significantly from 212°F (100°C), take note of the difference and consider recalibrating or replacing the thermometer for more precise temperature measurements.
7. Regular Testing And Maintenance
To ensure ongoing accuracy, it's recommended to periodically test your grill thermometer. Conduct the ice bath and boiling water tests at least once a year or whenever you suspect the readings are inaccurate.
Additionally, keep your thermometer clean and handle it with care to prevent damage that could affect its accuracy. Refer to the manufacturer's instructions for specific cleaning and maintenance guidelines.
How To Determine Grill Temperature Without A Thermometer
While having a reliable grill thermometer is the best way to ensure precise temperature control, there may be situations where you find yourself without one.
Whether you forgot to bring it along for a picnic or your thermometer suddenly stopped working, it's still possible to estimate the temperature of your grill using alternative methods.
Here are a few techniques to help you gauge the grill temperature without a thermometer:
Hand Test Method:
The hand test method is a straightforward way to estimate the temperature of your grill without using a thermometer. Follow these steps:
1. Carefully hold your hand about 6 inches above the grill grate in the area where you'll be cooking. Be mindful of the heat and avoid touching the grill or grate directly.
2. Assess the level of heat by gauging how long you can comfortably keep your hand in place:
High heat: If you can only hold your hand for 1-2 seconds before it becomes too hot, the grill is at a high temperature.
Medium heat: If you can hold your hand for 3-4 seconds before it becomes uncomfortable, the grill is at a medium temperature.
Low heat: If you can hold your hand for 5-6 seconds before it becomes too hot, the grill is at a low temperature

Isual Clues:
You can estimate the temperature of your grill by paying attention to visual cues. Look for these signs:
Color and intensity of flames or coals:
High heat: Flames are intense, and coals are glowing red with a thin layer of ash.
Medium heat: Flames are moderate, and coals are mostly covered in ash with a faint red glow.
Low heat: Flames are minimal or not visible, and coals are covered in ash without any visible glow.
By observing these visual cues, you can get a sense of the temperature range on your grill. However, keep in mind that this method provides a rough estimation and may not be as accurate as using a thermometer. Always prioritize safety and use other temperature-checking methods for more precise results.
Cooking Time Adjustments:
You can adjust your cooking times by using your experience and past grilling sessions as a guide. Here's how:
1. Keep a record: Take note of the cooking times for different types of food at various grill temperatures. This will help you build a reference guide for future grilling sessions.
2. Observe the cooking progress: Pay close attention to how your food is cooking. By observing the changes in texture, color, and doneness, you can make educated estimates of the grill temperature.
Using your experience and observations, you can make necessary adjustments to your cooking times to ensure that your food is grilled to perfection. However, remember that having a thermometer is still the most accurate way to gauge the temperature and achieve consistent results.
Use A Meat Test:
When grilling meat or food that needs to reach a specific internal temperature for doneness, you can use it as a guide to estimate the grill temperature. Here's how:
1. Refer to cooking charts or recipes: Look up the recommended internal temperature for the type of meat you're grilling. These resources will provide you with the target temperature to ensure safe and delicious results.
2. Monitor the cooking time and appearance: Keep an eye on the cooking time and observe how the meat is cooking. As you gain experience, you'll start to recognize the visual cues that indicate the level of doneness. This will help you estimate the grill temperature.
By using the desired internal temperature and keeping track of the cooking time and appearance, you can make informed judgments about the grill temperature. However, it's important to note that relying solely on this method may not be as accurate as using a dedicated grill thermometer.
While these methods can provide a general idea of the grill temperature, it's important to note that they are not as accurate as using a dedicated grill thermometer.
Don't Risk undercooking Or Overcooking Your Food
Without a thermometer, there is a risk of undercooking or overcooking your food. It's always recommended to use a thermometer whenever possible for precise temperature control and to ensure food safety.
Remember, practice and experience will help refine your ability to estimate grill temperature without a thermometer.
Definitely A Worthwhile Investment
However, if you regularly find yourself grilling without a thermometer, it's a worthwhile investment to purchase a reliable grill thermometer to enhance your grilling skills and achieve consistent results.
How To Install A Thermometer On Your Grill: A Comprehensive Guide For Perfectly Grilled Food Conclusion
By calibrating and regularly testing your grill thermometer, you can ensure its accuracy and trust it to give you precise temperature readings when you're grilling.
This means you can have confidence that the thermometer is working correctly and rely on it to help you cook your food to perfection every time.
Accurate Temperature Monitoring Is Crucial
Having accurate temperature monitoring is extremely important for getting your grilled food just right and keeping it safe to eat.
When you install a thermometer on your grill, it can completely transform your grilling experience by helping you achieve outstanding results.
With the information and techniques we've shared in this guide, you now have the ability to install, calibrate, and use a thermometer effectively to take control of the temperature and create amazing grilled dishes.
Say Goodbye To Guesswork
No more guessing games! Say farewell to uncertainty and hello to mouthwatering grilled meals every time. With a little practice, you'll become a grilling expert, wowing your loved ones with perfectly cooked dishes.
Don't hesitate any longer—install that thermometer and set off on a flavorful adventure to become a grilling master.
Make sure to comeback to SmokyBeginnings.com as we are continuously adding new recipes and tips to the site.
Happy grilling!
How To Install A Thermometer On Your Grill
Frequently Asked Questions
A: The best location for a grill thermometer depends on the type of thermometer you have.
For dial thermometers with a stem, the ideal spot is in the air, not touching any cooking grates or coals. Aim for a location in the center of your grilling area, but away from direct heat sources. This will provide an accurate reading of the ambient cooking temperature.
For digital thermometers with probes, you can insert the probe directly into the thickest part of the meat you're grilling. This will give you a reading of the internal temperature of the food, which is the most important factor for determining doneness.
A: If you're using a dial thermometer with a stem on a Weber grill, there should be a designated spot for it. On Weber kettle grills, this is usually a clip attached to the lid.
A: The answer is the same as for a grill thermometer - the best location depends on the type of thermometer. Refer to the section above for recommendations on placement based on the type of thermometer.
A: For dial thermometers, simply monitor the air temperature reading on the gauge.
For digital thermometers with probes, insert the probe into the thickest part of the meat you're grilling, avoiding bones. The thermometer will display the internal temperature of the food. Consult a safe minimum internal temperature guide to determine when your food is cooked through.
A: For accurate outdoor temperature readings, avoid placing your thermometer in direct sunlight or near heat sources like grills or vents. A shaded area, at least 4 feet off the ground is ideal.
A: Most grill thermometers are accurate, but it's always a good idea to check for accuracy from time to time. You can do this with a boiling water test. Bring a pot of water to a boil on the stovetop. Insert your grill thermometer probe into the boiling water. The thermometer should read around 212°F (100°C) at sea level. If the reading is way off, consider replacing your thermometer.
Recent Posts

Download My FREE Cookbook!
Elevate your BBQ skills and confidence with my straightforward guide. Packed with simple, tasty recipes, it's your ticket to becoming a BBQ pro.
Plus, by joining the Smoky Beginnings community, you'll gain access to exclusive monthly recipes, updates on new products, and special discounts.

About the author
CJ Ferrara
CJ Ferrara is a BBQ enthusiast, who shares his passion for grilling and smoking meats with the readers of Smoky Beginnings. When he isn't grilling, smoking meat, or writing BBQ-focused articles you can catch him spending time with his family and enjoying a sporting event.
Find out more about CJ on our About Us page
SmokyBeginnings.com is a participant in the Amazon Services LLC Associates Program, an affiliate advertising program designed to provide a means for sites to earn advertising fees by advertising and linking to Amazon.com.


Copyright 2024 , all rights reserved.